Firstly, why should you invest in a brand photoshoot?
Branding photoshoots create a sense of trust in you and your business. If potential clients feel connected to you through your stories and images they're more likely to want to invest in you, rather than a 'faceless' brand.
The idea of being photographed can seem too daunting, and you may be tempted to use stock images so you don’t have to get in front of the camera. Even though we have thousands of free stock images available to us, nothing beats unique and personalised images for your own business.
To make the process easier and get the most out of your brand photoshoot, I’ve listed below 10 steps to follow. I’ve also included some tips from my own branding photographer Deanna Walker.
1 // Find a photographer who is a great fit for you
Search for photographers in your area. Research their previous work and photography style – you may be wanting light and airy images, or deep and earthy – each photographer will have their own unique style, so it’s best to look for this first rather than expect them to work to your specifications. If you love the branding images from another local business ask who they used.
Be prepared to make an investment. For an impressive collection of images to use throughout your website, social media and collateral expect to pay on average NZ$500-$1000, but without a doubt there are commercial photographers who would charge in the thousands!
Arrange a meeting with the photographer before you book your session, if you don’t feel comfortable talking with them, you most likely won’t feel comfortable with them during the shoot, and that discomfort will show in your images. A professional photographer should know how to put you at ease, help you relax, and most importantly make you laugh!
I chose Deanna from Birdie because I absolutely love the bright style of her images, and knew they would match my branding aesthetics perfectly. I arranged a meeting with Deanna to talk through what I wanted to get out of my session and found her very easy and relaxing to be with. On the day we had an absolute blast and Deanna eased my camera discomfort almost immediately!
2 // Will your images be formal or casual?
Will you be barefoot in a home office? Or in a suit in a boardroom? Think about the best representation of your business and where you visualise yourself in 5 years time. Communicate this with your photographer.
3 // Decide which image styles you love
If you know the style of images, or the overall look that you’re after, you should choose your photographer based on their style, strengths and specialty. While many photographers can be versatile, they also generally have an aesthetic, and you don’t want to be disappointed. Much like you would commission an abstract painting from a painter who specialises in abstract art.
Pinterest is great for image inspiration. Search terms such as ‘brand photos’ or ‘business photos’ and create some boards with the styles and poses you like, share them with your photographer.
Think about your selection and if they are representative of yourself and your business. If you don’t want everyone to see your board you can set it to be secret.
I’ve created this board to help you get started: https://www.pinterest.com.au/designerbloom_graphicdesign/brand-photoshoot-ideas/
4 // Create a list of images you want to get on the day
Firstly, you’ll want to have simple headshot. Businesses will ask for one if they are featuring you, and you’d be surprised how many times you will need it.
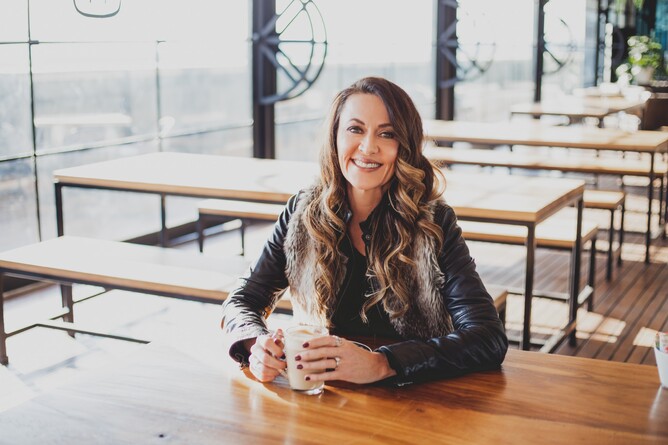
Secondly, do you want images of you talking on the phone? Or perhaps drinking tea, sitting on the ground, walking down the street… Think about the content you’ll be using them for. If you’d like to have a Project Process page on your website you may want some examples of you working on some of those processes. If you’re keen to start blogging think about how your images can tie in with the subject.
Send your list to your photographer beforehand, it will help make the day run much smoother and you won’t have regrets later because of a missed shot.
Most importantly though, trust your photographer when it comes to angles and compositions. They have a creative eye, and it’s a good idea to trust their vision. If you have any must-haves (for example you might need a flatlay of your hands on the keyboard) then let them know, but leave them plenty of room for creative freedom - this is often when the best content is captured!
5 // Choose a location
Definitely talk this through with your photographer. They may have a list of locations they tend to work from that you can choose. Reach out to local businesses who’s images you love and ask where their session location was.
You’re likely to feel more at ease in an outdoor location if it suits your brand (if you’re a beauty salon it’s a good idea to have images of you in your salon, where your clients will meet you, rather than on a beach dancing in the sand!).
If you’d like your session in your home or office understand it can be tricky to work with artificial lighting and small spaces. Your photographer may recommend a staged location instead.
Do you want other people in your images? If your business is service based you might like to have a ‘client’ (ie friend!) that you’re talking to in soft focus in the photos.
6 // Let your photographer know where you want to use your images
If you are planning to get a large banner printed, your photographer will probably need to adjust the camera settings before shooting.
Think about the orientation of your photographs. For your website you ideally need a variety of horizontal feature banners, therefore your images will need to be landscape, not portrait.
In your shot list (Step 4) write ‘portrait’ or ‘landscape’ beside each shot, or even ‘both’. It’s best for your photographer to know beforehand than to try and alter in Photoshop afterwards.
Ask your photographer how you are allowed to use the images in terms of copyright and licensing.
7 // Practice striking a pose!
It will feel awkward when you first stand in front of the camera. If you practise poses beforehand in a mirror it might prepare you a little. Consider wearing something with pockets so you can put your hands in them if you start to feel awkward, or carry your laptop, phone, glasses, or some other prop. On the day try not to feel embarrassed – flow between different poses, turn your body, move your feet, look up, smile, look into the distance, give a little giggle, and have fun!
8 // Wear colours (clothing / accessories) similar to your branding colour scheme
If your brand is mostly soft blues and greens you will contradict this if you’re wearing a hot pink top, or standing in front of a bright orange wall. Consider props in the background which also match your branding colours – artwork, flowers, desk items, decor or rugs.
If you’re having other people in your photos send them your brand colours and ask them to wear similar tones in their outfits. Send your brand colours to your photographer too as they may have some props in their collection you could use.
Sometimes what you choose to wear doesn’t look that great on the day with the lighting and surrounding colours. Bring a few outfit options, perhaps in lighter and darker colours. Choose a jacket or easy layers, so you can quickly change up your look for some shots.
9 // Help each other grow
Can you feature products, clothes or accessories in your shoot that you could tag on social media and then perhaps get featured on their accounts? Is there a small business you could support by wearing their items? They might repost your images for their own content and tag you in it, furthering your reach.
Make sure you tag your photographer, makeup artist, hairdresser etc when you post your images.
10 // Look your best!
You’ll most likely be very nervous on the day of your shoot. I recommend you go for a look you’re comfortable with - if you’re most comfortable makeup free, go for it, but makeup will likely give you a huge confidence boost. An experienced make-up artist will know the best application for camera and lighting, and how to enhance your natural beauty. You’ll feel and look amazing and your confidence will come across during your shoot.
Have an idea of a hairstyle that you want, but make sure you choose a style which you regularly wear (now is not the time for a drastic change!).
Remember that the photos are to show your clients/potential clients what you look like, give a behind the scenes look, and feel like they know you - and also so they can recognise you when they meet you in person to discuss your project! So make sure you still look like yourself.
I hope these steps help you to achieve the best branding images you could hope for!
